Running in a container on your own computer
GLAM Workbench repositories are stored as pre-built container images on quay.io. You can run these containers on your own computer to set up a virtual machine with everything you need to use the notebooks. This is free, but requires more technical knowledge – you'll have to install Podman on your computer, and be able to use the command line.
Under construction
I'm still adding the necessary configuration files to all the GLAM Workbench repositories. If you don't see an option to use a container, it means I haven't set that section up yet.
Quick start
The GLAM Workbench repositories are stored as pre-built 'Images' on Quay.io. To download and run one of these images for the first time, you need to:
- Install Podman.
- Run the following command in a terminal, replacing
[REPOSITORY NAME]with the name of a GLAM Workbench repository, for example, 'trove-newspapers':
podman --rm run -p 8888:8888 glamworkbench/[REPOSITORY NAME] jupyter lab --ip=0.0.0.0 --port=8888 --ServerApp.token="" --LabApp.default_url="/lab/tree/index.ipynb" - It will take a while to download the image and configure the container. Once it's ready you'll see a message saying that Jupyter Server is running.
- Point your web browser to
http://127.0.0.1:8888 - To stop the container enter Ctrl+C in ther terminal.
Error: address already in use
If you get an error telling you 'address already in use', it means that there's already a server running on the 8888 port. All you need to do is change 8888 in the command above to some other number, such as 8889 or 9999. for example:
podman --rm run -p 8889:8889 glamworkbench/[REPOSITORY NAME] jupyter lab --ip=0.0.0.0 --port=8889 --ServerApp.token="" --LabApp.default_url="/lab/tree/index.ipynb"
http://127.0.0.1:8889
Saving and reusing a container
The quick start instructions run a container once and delete it when you've finished. Any changes you've made to the notebooks, or data you've harvested, will be lost unless you download them from the Jupyter Lab interface before you shut down the container. But sometimes you might want to save a container with any changes and run it again later. To do this, you should give a name to your container using the --name parameter, and instead of using the --rm parameter to delete the notebook when you've finished, add the --detach parameter. So the command to run the container would be:
podman run --detach --name [YOUR CONTAINER NAME] -p 8888:8888 glamworkbench/[REPOSITORY NAME] jupyter lab --ip=0.0.0.0 --port=8888 --ServerApp.token="" --LabApp.default_url="/lab/tree/index.ipynb"
Running this in a terminal will return you to the command prompt, so you can enter additional instructions. To stop a running container (saving any changes):
podman stop [YOUR CONTAINER NAME]
To restart a stopped container:
podman start [YOUR CONTAINER NAME]
Then open the Jupyter url in your browser – http://127.0.0.1:8888 (unless you've changed the port number).
To delete a container:
podman rm [YOUR CONTAINER NAME]
Error: the container name is already in use
If you get an error telling you 'the container name is already in use', it means that there's already a container with your supplied name. If you want to restart an existing container use:
podman start [YOUR CONTAINER NAME]
podman rm [YOUR CONTAINER NAME]
Then re-enter the podman run command.
Understanding the podman run command
In case you're wondering what all the options after the podman run command actually do, I've listed them below.
--rm– Automatically deletes the container when you shut it down.--detach– Returns you to the command prompt once the container is running.-p 8888:8888– Sets the port number that you use to access the Jupyter server. If you already have an application using the '8888' port you can change the first value to something else, like '9999'. You'd then access Jupyter athttp://127.0.0.1:9999.--name [REPOSITORY NAME]– When you usedocker runto download and run an image, you create a 'container' that wraps around the image, saving its files and configuration. Thenamevalue sets the name of this container. You can then use this value to manage the container. You can set the name to anything you want, but naming it after the GLAM Workbench repository seems to make sense.glamworkbench/[REPOSITORY NAME]– This is the name of the image you want to install from Docker Hub.jupyter lab --ip=0.0.0.0 --port=8888– This is the command to start up Jupyter Lab. Setting the IP address to '0.0.0.0' ensures that the Jupyter server will be accessible from outside the container.--NotebookApp.token=''– Because you're running Jupyter locally, there's no reason to secure it with a token or password. This just says that no token is needed.--LabApp.default_url='/lab/tree/index.ipynb'– This sets a default landing page for Jupyter Lab. You could change this to point to a specific notebook, or just leave it out.
Accessing your files
You can't access files in the container from your local filesystem. So to use files outside of the GLAM Workbench container, you need to download them from Jupyter.
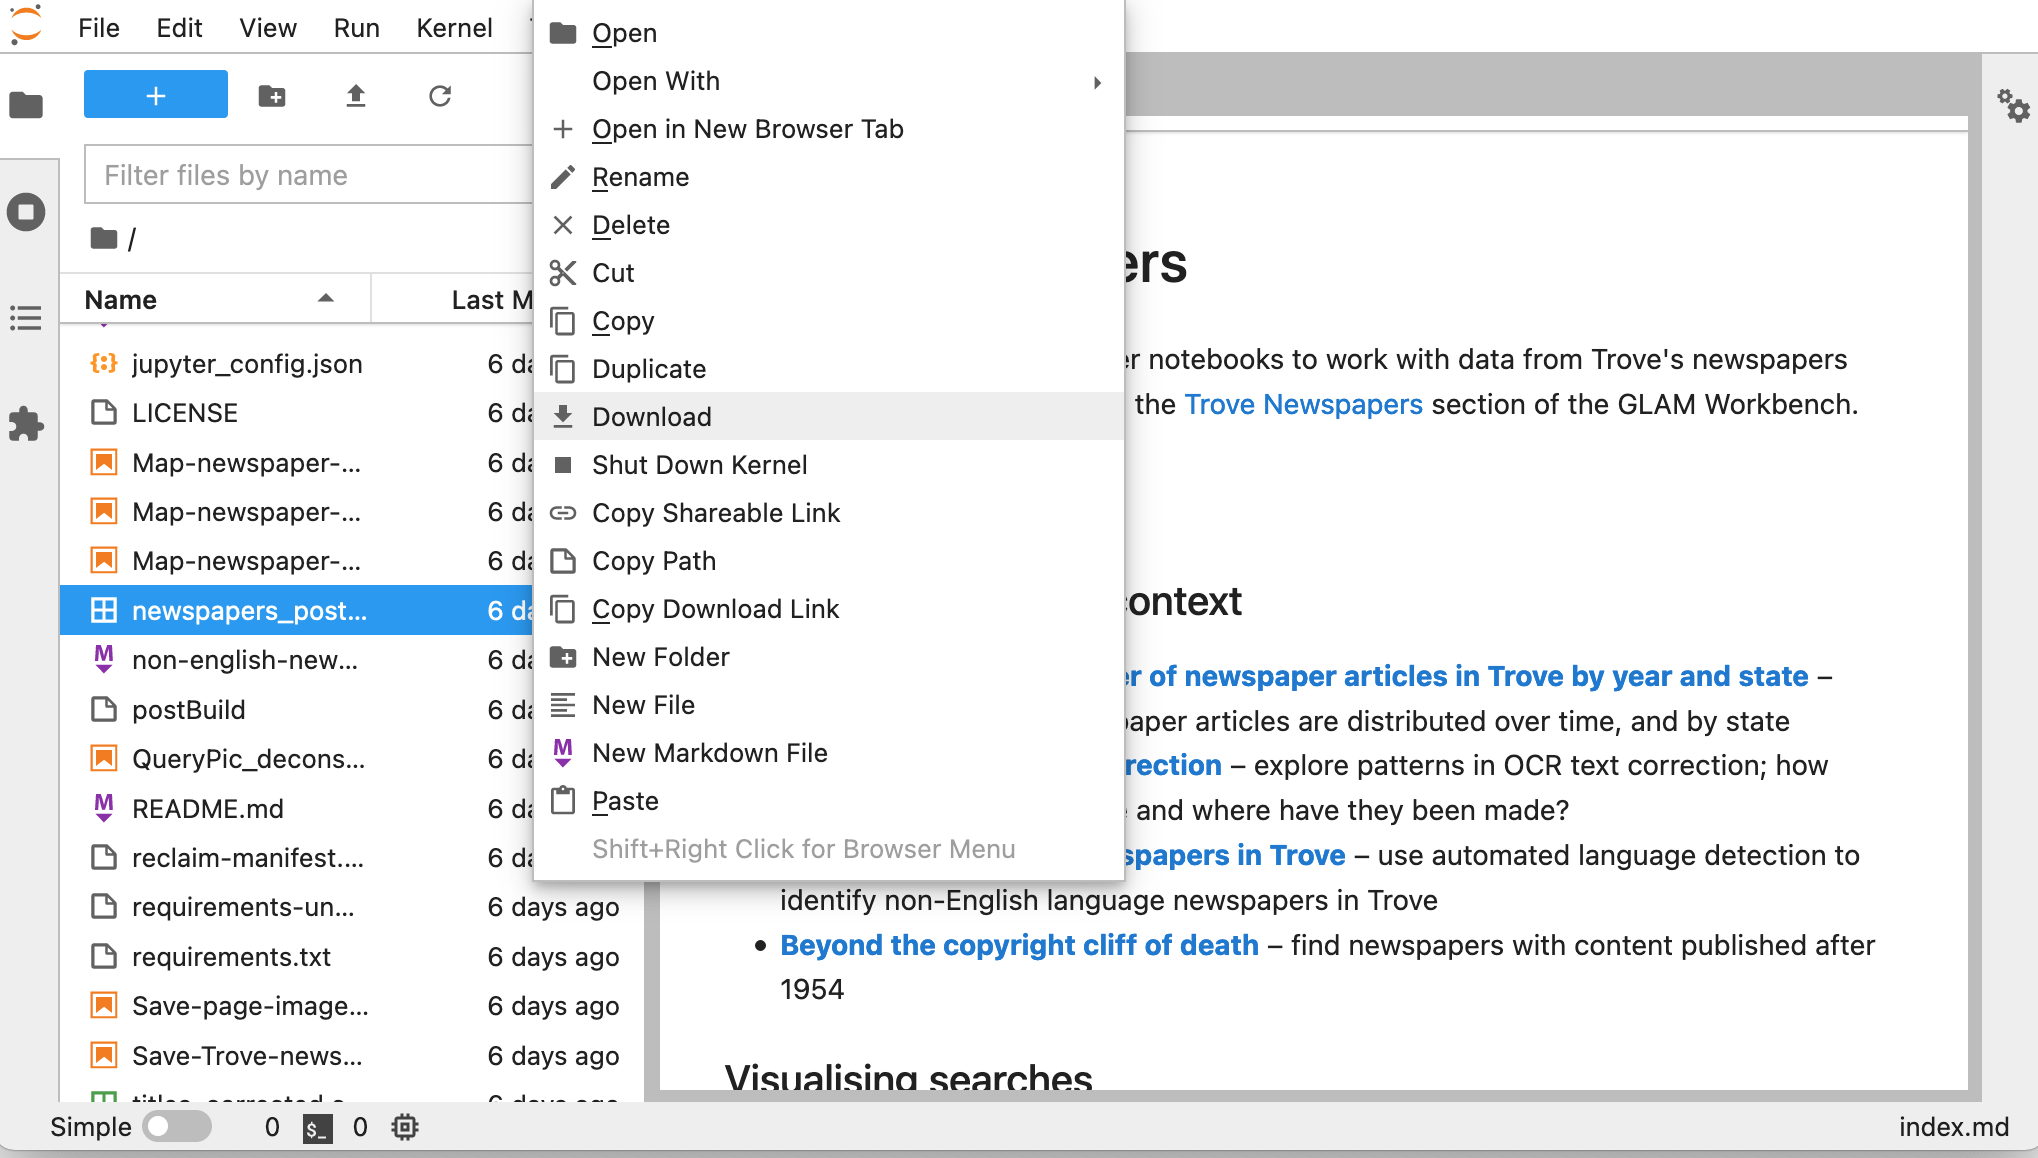
Many of the notebooks in the GLAM Workbench will display download links when you create a new dataset. But you can also just use the file explorer built into Jupyter Lab.
- Right click on a file in the file explorer.
- Select Download.
Many GLAM Workbench repositories also include the jupyter-archive extension. This extension adds a 'Download as an archive' option to the file manager's right click menu. Selecting this option will download a complete folder as a .zip file.
Updating a GLAM Workbench image
When GLAM Workbench repositories are updated, a new container image is saved in quay.io. However, if you've previously run a container, the image won't be automatically updated the next time you use podman run. To make sure you're using the latest image:
- In a terminal enter
docker pull [REPOSITORY NAME]– this updates the image on your computer. - Now when you enter
podman runthe new image will be used.
Need help?
There's more details than you would ever want in the official Podman docs.