Te Papa collections
Current version: v1.0.0
Te Papa has a very well-documented API that provides rich information about its collection and the relationships between collection items and other entities, including people and places.
You'll need an API key for serious exploration.
Tips, tools, and examples
Exploring the Te Papa collection API
This notebook is just a preliminary exploration of the API. It drills down through some of the facets to try and get a picture of what data is available.
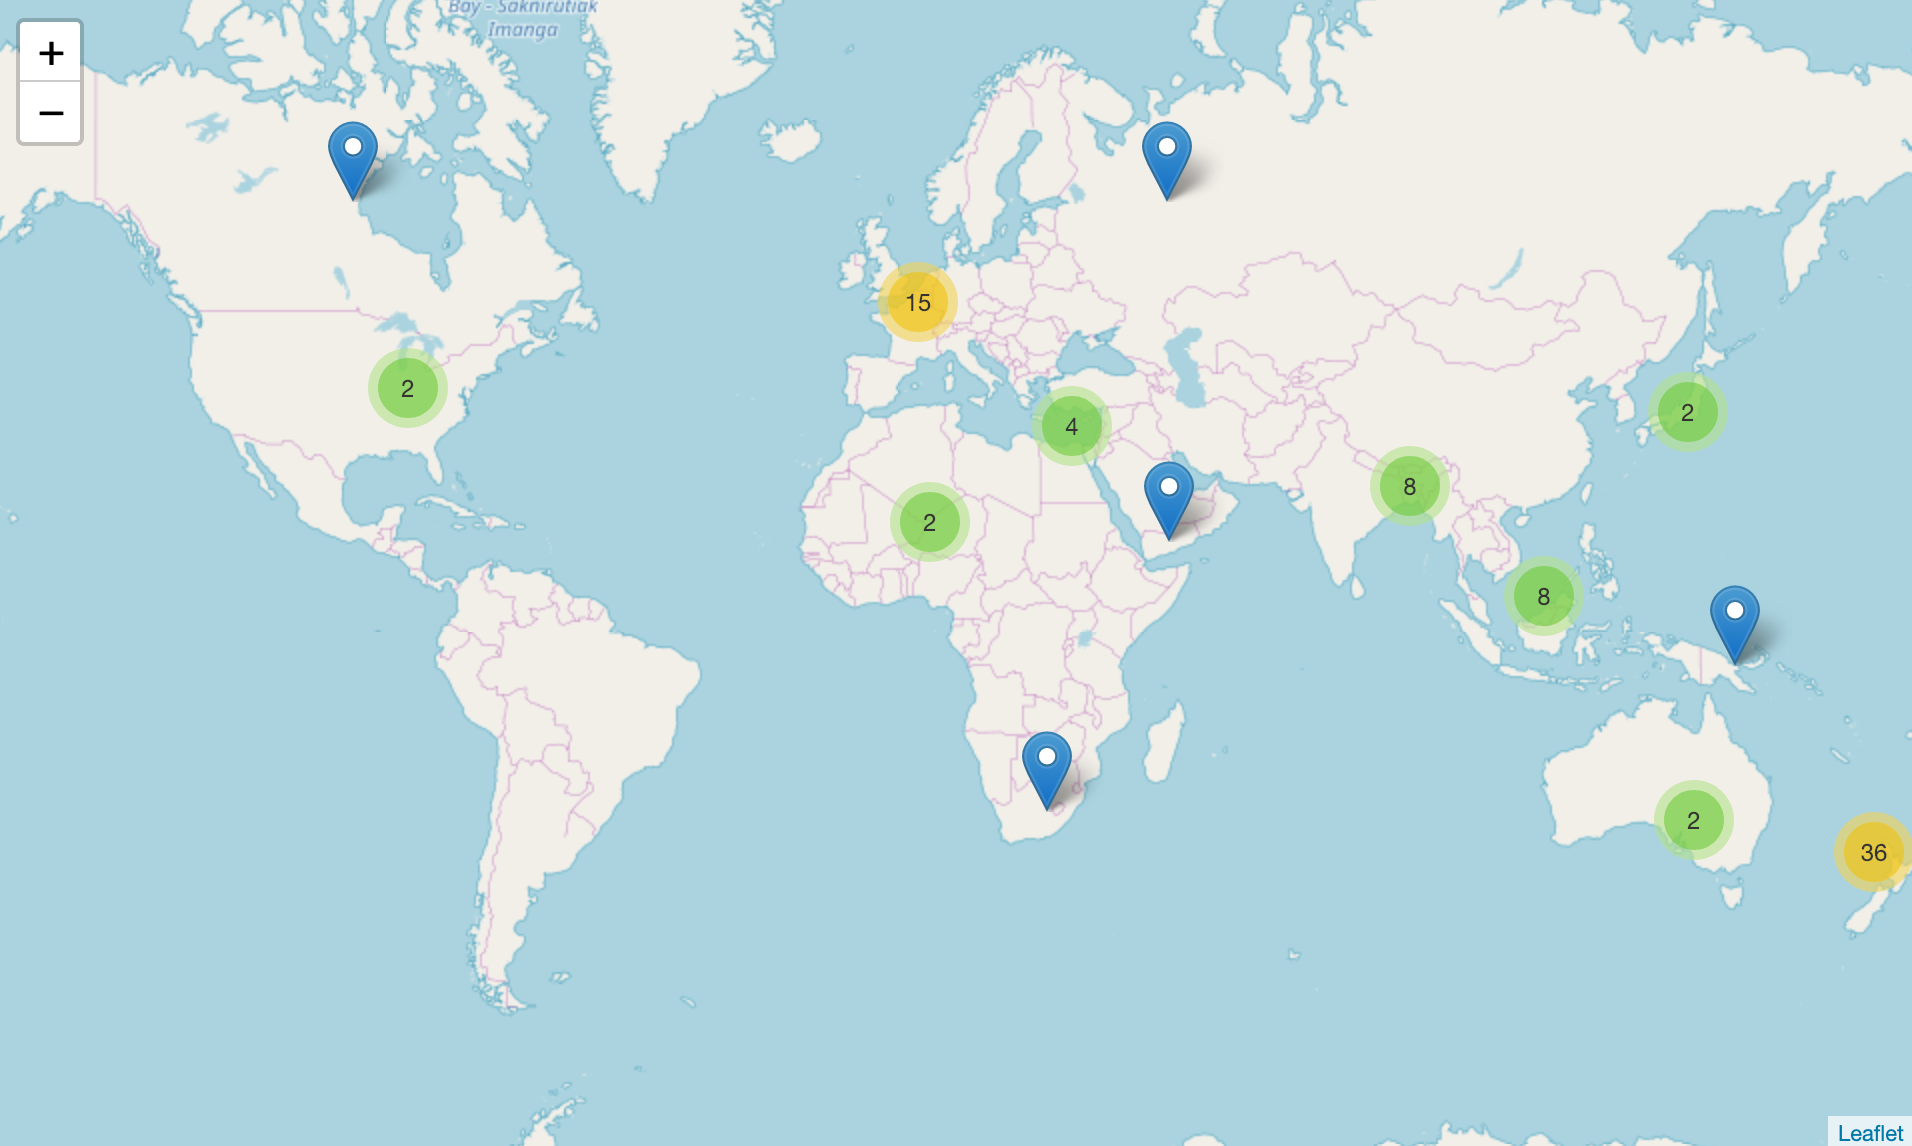
Mapping Te Papa's collections
This notebook creates some simple maps using the production.spatial facet of the Te Papa API to identify places where collection objects were created.

Run these notebooks
There are a number of different ways to use these notebooks. Binder is quickest and easiest, but it doesn't save your data. I've listed the options below from easiest to most complicated (requiring more technical knowledge).
Using Binder
Click on the button above to launch the notebooks in this repository using the Binder service (it might take a little while to load). This is a free service, but note that sessions will close if you stop using the notebooks, and no data will be saved. Make sure you download any changed notebooks or harvested data that you want to save.
See Using Binder for more details.
Using Reclaim Cloud
Reclaim Cloud is a paid hosting service, aimed particularly at supported digital scholarship in hte humanities. Unlike Binder, the environments you create on Reclaim Cloud will save your data – even if you switch them off! To run this repository on Reclaim Cloud for the first time:
- Create a Reclaim Cloud account and log in.
- Click on the button above to start the installation process.
- A dialogue box will ask you to set a password, this is used to limit access to your Jupyter installation.
- Sit back and wait for the installation to complete!
- Once the installation is finished click on the 'Open in Browser' button of your newly created environment (note that you might need to wait a few minutes before everything is ready).
See Using Reclaim Cloud for more details.
Using the Nectar Cloud

The Nectar Research Cloud (part of the Australian Research Data Commons) provides cloud computing services to researchers in Australian and New Zealand universities. University-affiliated researchers can log on to Nectar and receive up to 6 months of free cloud computing time. And if you need more, you can apply for a specific project allocation.
The GLAM Workbench is available in the Nectar Cloud as a pre-configured application. This means you can get it up and going without worrying about the technical infrastructure – just fill in a few details and you're away! To create an instance of this repository in the Nectar Cloud:
- Log in to the Nectar Dashboard using your university credentials.
- From the Dashboard choose Applications -> Browse Local.
- Enter 'GLAM' in the filter box and hit Enter, you should see the GLAM Workbench application.
- Click on the GLAM Workbench application's Quick Deploy button.
- Step through the various configuration options. Some options are only available if you have a dedicated project allocation.
- When asked to select a GLAM Workbench repository, choose 'Te Papa collections' from the dropdown list.
- Complete the configuration and deploy your GLAM Workbench instance.
- The url to access your instance will be displayed once it's ready. Click on the url!
See Using Nectar for more information.
Using Docker
You can use Docker to run a pre-built computing environment on your own computer. It will set up everything you need to run the notebooks in this repository. This is free, but requires more technical knowledge – you'll have to install Docker on your computer, and be able to use the command line.
- Install Docker Desktop.
- Create a new directory for this repository and open it from the command line.
- From the command line, run the following command:
docker run -p 8888:8888 --name tepapa -v "$PWD":/home/jovyan/work quay.io/glamworkbench/te-papa-api repo2docker-entrypoint jupyter lab --ip 0.0.0.0 --NotebookApp.token='' --LabApp.default_url='/lab/tree/index.ipynb' - It will take a while to download and configure the Docker image. Once it's ready you'll see a message saying that Jupyter Notebook is running.
- Point your web browser to
http://127.0.0.1:8888
See Using Docker for more details.
Setting up on your own computer
If you know your way around the command line and are comfortable installing software, you might want to set up your own computer to run these notebooks.
Assuming you have recent versions of Python and Git installed, the steps might be something like:
- Create a virtual environment, eg:
python -m venv tepapa - Open the new directory"
cd tepapa - Activate the environment
source bin/activate - Clone the repository:
git clone https://github.com/GLAM-Workbench/te-papa-api.git notebooks - Open the new
notebooksdirectory:cd notebooks - Install the necessary Python packages:
pip install -r requirements.txt - Run Jupyter:
jupyter lab
See the Getting started for more details.
Contributors
Cite as
Sherratt, Tim. (2021). GLAM-Workbench/te-papa-api (version v1.0.0). Zenodo. https://doi.org/10.5281/zenodo.5715715

