Libraries Tasmania
Current version: v1.0.0
A collection of tools and examples for working with data from Libraries Tasmania.
You might also find the Zotero translator for the Libraries Tasmania catalogue useful.


Tasmanian Post Office Directories
The Tasmanian Post Office Directories from 1890 to 1948 have been digitised and made available by Libraries Tasmania for download as PDFs. These notebooks document a workflow that extracts text and images from the PDFs to build a searchable database of their contents.
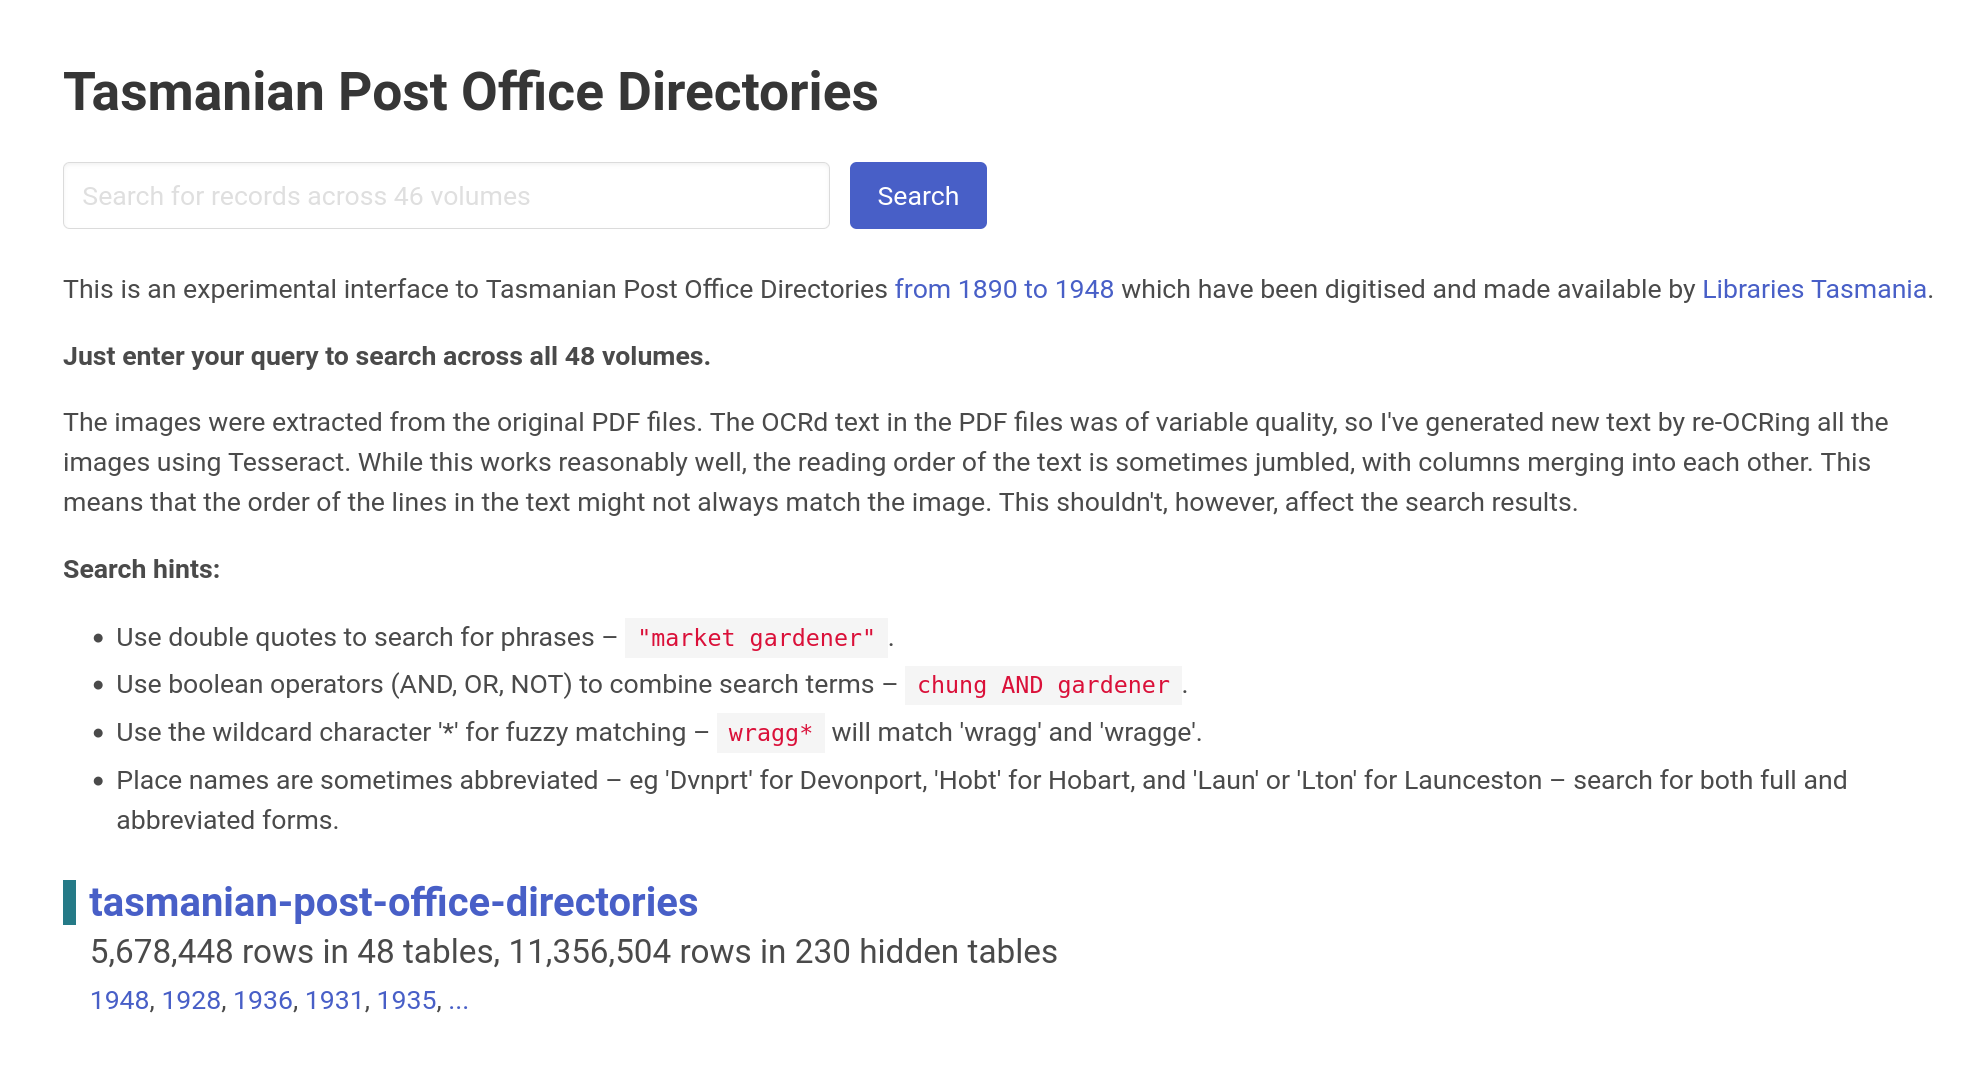 Search for people and places in Tasmania
Download and process Tasmanian Post Office Directory PDFs
This notebook downloads all 48 Tasmanian Post Office Directory PDFs, then extracts images and text from the PDFs using PyMuPDF.
Upload Tasmanian Post Office Directory images to Amazon s3 for IIIF
This notebook converts the images extracted from the Post Office Directory PDFs into pyramidal TIFFs using pyvips and then uploads them to an Amazon s3 bucket for delivery via IIIF.
Extract text from PDF images using Tesseract
This notebook uses Tesseract (OCR) to extract text directly from the images in the Tasmanian Post Office Directory PDFs.
Add content from the Tasmanian Post Office Directories to an SQLite database
This notebook brings everything together text and images from the Tasmanian Post Office Directories in an SQLite database ready for delivery through Datasette.
See the GLAM Workbench for more details.
Run these notebooks
There are a number of different ways to use these notebooks. Binder is quickest and easiest, but it doesn't save your data. I've listed the options below from easiest to most complicated (requiring more technical knowledge).
Using ARDC Binder

Click on the button above to launch the notebooks in this repository using the ARDC Binder service. This is a free service available to researchers in Australian universities. You'll be asked to log in with your university credentials. Note that sessions will close if you stop using the notebooks, and no data will be preserved. Make sure you download any changed notebooks or harvested data that you want to save.
See Using ARDC Binder for more details.
Using Binder
![]()
Click on the button above to launch the notebooks in this repository using the Binder service (it might take a little while to load). This is a free service, but note that sessions will close if you stop using the notebooks, and no data will be saved. Make sure you download any changed notebooks or harvested data that you want to save.
See Using Binder for more details.
Using Reclaim Cloud

Reclaim Cloud is a paid hosting service, aimed particularly at supported digital scholarship in hte humanities. Unlike Binder, the environments you create on Reclaim Cloud will save your data – even if you switch them off! To run this repository on Reclaim Cloud for the first time:
- Create a Reclaim Cloud account and log in.
- Click on the button above to start the installation process.
- A dialogue box will ask you to set a password, this is used to limit access to your Jupyter installation.
- Sit back and wait for the installation to complete!
- Once the installation is finished click on the 'Open in Browser' button of your newly created environment (note that you might need to wait a few minutes before everything is ready).
See Using Reclaim Cloud for more details.
Running in a container on your own computer
GLAM Workbench repositories are stored as pre-built container images on quay.io. You can run these containers on your own computer to set up a virtual machine with everything you need to use the notebooks. This is free, but requires more technical knowledge – you'll have to install Podman on your computer, and be able to use the command line.
- Install Podman.
- In a terminal, run the following command:
podman run --rm -p 8888:8888 quay.io/glamworkbench/libraries-tasmania jupyter lab --ip=0.0.0.0 --port=8888 --ServerApp.token="" --LabApp.default_url="/lab/tree/index.ipynb" - It will take a while to download and configure the container image. Once it's ready you'll see a message saying that Jupyter Notebook is running.
- Point your web browser to
http://127.0.0.1:8888 - When you've finished, download any files or data you want to keep from Jupyter Lab, and enter Ctrl+C int the terminal.
See Running in a container on your own computer for more details.
Setting up on your own computer
If you know your way around the command line and are comfortable installing software, you might want to set up your own computer to run these notebooks. You'll need to have recent versions of Python and Git installed. I use pyenv, pyenv-virtualenv, and pip-tools to create and manage Python versions and environments.
In a terminal:
- Create a Python virtual environment (Python >= 3.10 should be ok):
pyenv virtualenv 3.10.12 libraries-tasmania - Activate the virtual environment:
pyenv local libraries-tasmania - Use
git cloneto create a local version of the GLAM Workbench repository:git clone https://github.com/GLAM-Workbench/libraries-tasmania.git - Use
cdto move into the newly-cloned folder:cd libraries-tasmania - Run
pip install pip-toolsto installpip-tools. - Run
pip-sync requirements.txt dev-requirements.txtto install the required Python packages. - Start Jupyter with
jupyter lab– a browser window should open automatically. If not, copy and paste the url from the command line to your web browser. - To shut down your Jupyter Lab session enter Ctrl+C in the terminal.
See Using Python on your own computer for more details.
Contributors
Cite as
Sherratt, Tim. (2022). GLAM-Workbench/libraries-tasmania (version v1.0.0). Zenodo. https://doi.org/10.5281/zenodo.7080837
![]()